RV Toilet Repair
RV Toilet Repair on a Dometic or Traveler Closet Flange Broken can be a true NIGHTMARE!
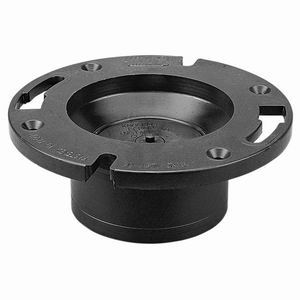
The original owner of our RV had told us that the toilet was lose because one of the closet flange tabs was broken. Well, we tried to fix it about 2 years ago to no avail. The "Stink" was getting worse and worse because the seal between the bottom of the toilet wasn't "air-tight".
It flushed fine and worked OK, it just was getting pretty annoying to deal with the odor all the time. Finally, after noticing the odor could be present when we open a kitchen cabinet drawer - we knew it was time to seriously check it out.
We ordered all our "rebuilding toilet parts" from Seacoast Services and waited for them to show up. Quickly enough they did. Now, we just had to pick a day when we could start early in the morning and stay with it until we fixed the problem. Since it had been at least a couple of years since we had the commode off - I couldn't remember the details of what was needed for the floor flange.
It only gets better - the floor flange now had only 2 securing areas - instead of the original 4!!
Wow - what a mess. No pictures though - that's never a pleasant site!
Then, to make matters worse, the one that was installed was no longer "available". "Worser" - the broken floor flange was liquid welded to the pipe going down through the floor, directly to the black tank.

Our RV Toilet Repair just got so much more involved. After some serious looking and staring, and trying to do anything but a new floor, we resigned ourselves to the fact that we had no other choice - we had to remove the floor that the commode was mounted on - to gain access to the welded/glued pipes.
After we had found some good plywood, we "looked" one more time at the broken flange and "Voila" - a "wonderful idea" came through the brain.
Why not just drill NEW bolt holes in the old flange to secure the 4 mounting bolts?
WOW!!!!!
After some serious measuring and figuring - it was a possibility!
Need RV Toilet Parts
The water source was on the blue crimped plastic pipe so we had to be sure to allow for its fixed length. Turning the toilet to the right would've allowed more room for your feet while on the commode - but no water!
We turned the commode towards the left, and we could still fit on the commode and have a water source!
So - what could've been a really, really involved "repair" turned out to be a very manageable fix.
We drilled the 4 holes needed to secure the commode to the floor, replaced all the seals and gate valves and had a nice clean "Non-Stinky" toilet again - YEAH!!!!
Moral of the story - explore all thoughts and avenues before starting a seriously major project!!!
Especially for an RV Toilet Repair challenge!